
Oh no. Just no.
Summer is not over! But even when that time comes, the weather turns non-sweaty, cool, and brisk which is perfect for hiking, camping, relaxing by the lake, and having the beach to yourself.
Personally, I'm a indoorsy gal. But I do love driving the countryside and taking in the vistas that only being out of town can bring on.
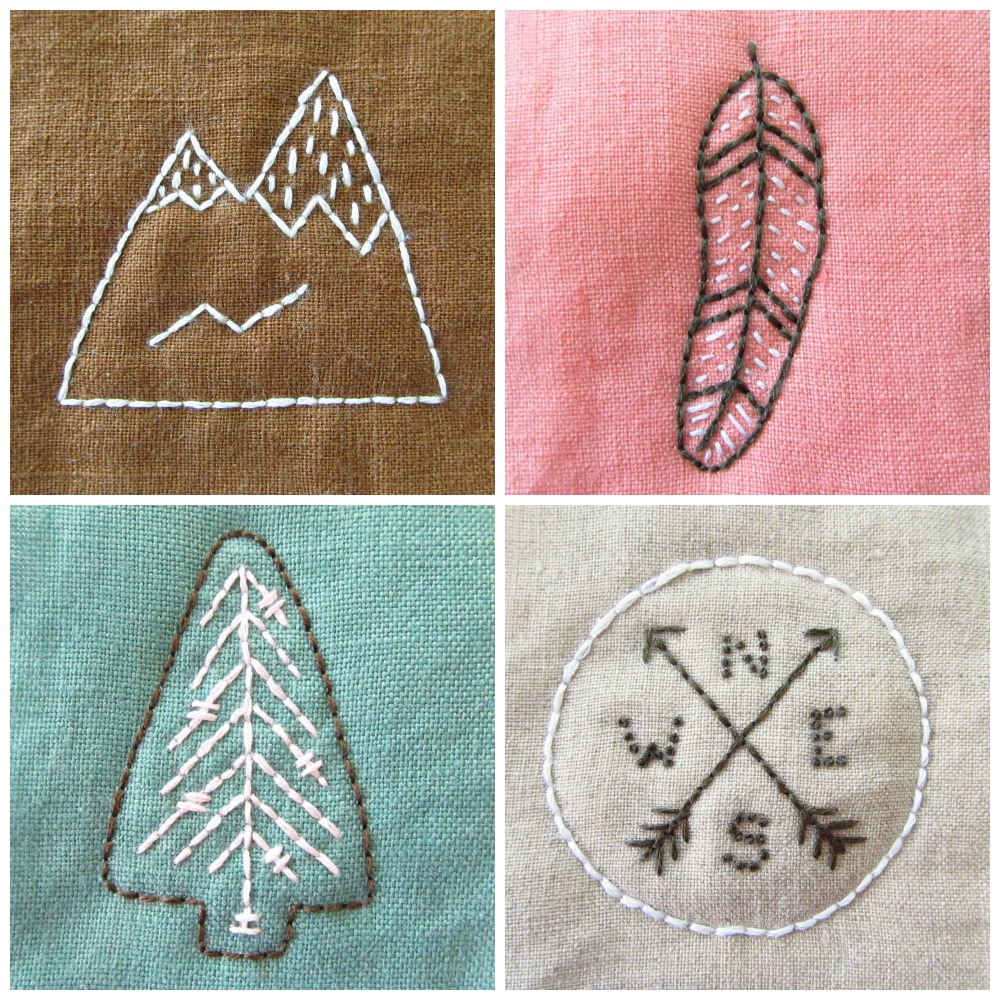
Embroider these adventure themes and express your wish for wanderlust. Use the finished stitching to make sew-on patches for backpacks, jackets, and caps. Or do what I did and make refrigerator magnets to remind you that a vacation is a necessity, not a luxury.
The set includes a mountain, tree, feather, and compass.

What you need:
free downloadable adventure pattern
small scraps of linen or cotton fabric
small scraps of cotton batting or flannel fabric
embroidery thread in white and a darker color (brown/ black)
embroidery needle
sewing machine or hand sewing needle and thread
iron
Optional supplies to make refrigerator magnets:
strong magnets
scrap cotton fabric
1) Download and transfer the pattern to the right side of the scraps you'll be using for the front of the embroidery.

2) Pin a piece of batting to the wrong side of the embroidery fabric.
3) Working through both the fabric and the batting, embroider the designs using back stitch, straight stitch, and french knots (compass letters).
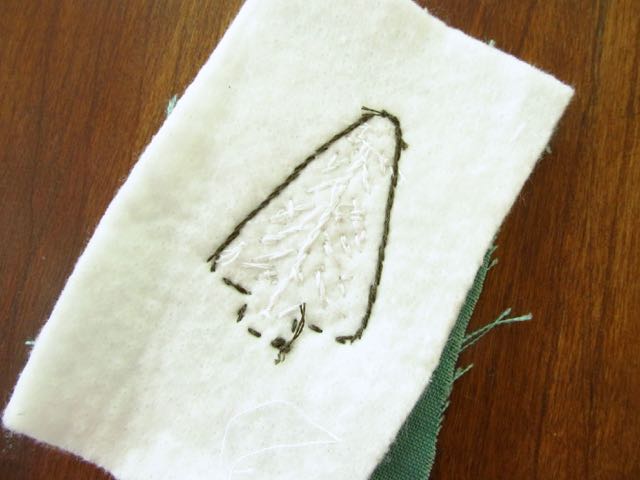
4) Place the embroidered work right sides together with a backing piece of fabric. Stitch around the design leaving a small opening for turning.
5) Trim the excess fabric down to within 5mm of the stitching and trim the batting further to reduce bulkiness. Turn right side out and press with a iron.

6) If you will be making fridge magnets, cut circles of fabric larger than the magnets. Sandwich a magnet between the two circles and hand stitch around the magnet edges. This traps the magnet and provides an insert that won't slide around and mess up the shape of the magnet. Place one magnet in each adventure pocket.

7) Hand stitch the opening closed.
IDEAS FOR USE:
Brooch: Sew a pin back to the back of the work.
Patch: Place the work on a jacket, your passport wallet, or your backpack and sew it on using a straight stitch or blanket stitch.
Tote: Enlarge the pattern and stitch four squares. Place them on a tote bag to make a patchwork of four pieces and stitch them on.
The designs are very simple and versatile. Have fun and with all the best intentions I say - go take a hike!

Did you know there is a new digital craft magazine in town? Stitch Cafe is a monthly magazine with 4-6 original patterns, plus tutorials, articles, and printable recipe cards.
Issues 1 and 2 are available now and Issue 3 will be out at the end of August. Want to know when these issues are available? Keep in touch via the weekly newsletter.

These are so cute! I think they could make sweet ornaments, too, especially the tree.
ReplyDeleteThat's a great idea! Thanks for sharing that. :-)
Delete