We're back and heading into the second half of the sampler. Good work! You're doing a great job!
Our first stitch can be a bit tricky, but once you "get" french knots, you'll not be able to stop making them.
French Knot
I used 4 strands for a healthy sized french knot.
Bring the threaded needle up just off center of the point where you want the stitch.
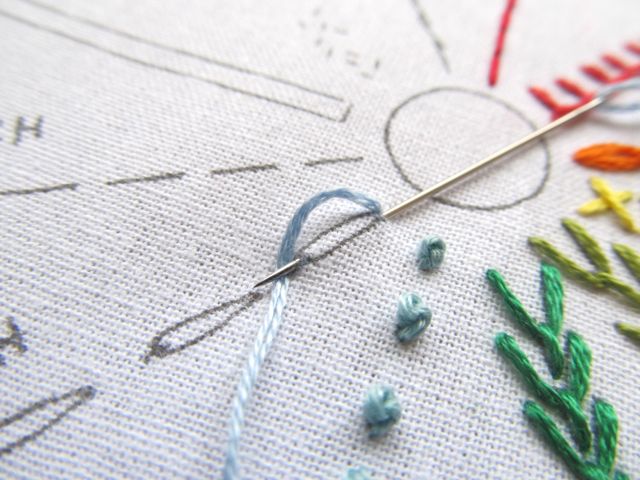
The second photo shows what you are doing. You are wrapping the needle with thread and then inserting it back down to form a decorative knot.
You will not be wrapping so loosely. This is just to show you the process.
With the needle wrapped 3 times and holding fairly tightly to the thread with your other hand, insert the needle just a couple of threads away from where it is coming up through the fabric.
You see how it's all held very close to the fabric. You can't see a big thread space between where it came up from the back and your wrapped loops.
Pull the needle to the back of the fabric, holding on to the tail of the wrapped thread, but not so tightly that you can't pull the needle through. This might be the trickiest common stitch. Play with it.
When it has been pulled through completely it will form a little knot with a little belly button in the middle.
This is the one stitch you might cut out and do over until you are happy with how your tension feels and your knots look.
Stick with it! You can do it!
Lazy Daisy Stitch
Well, thank goodness! This one is going to be a breeze!
This is just like the lesson four chain stitch, except it's a bunch of separate stitches instead of a connected chain of them.
Bring the threaded needle up from the back at the pointy end near the center of the wheel. Take it back down in the same hole or a thread or two away leaving a loop if thread. Bring the needle back up at the rounded bottom to catch the loop.
And then tack it down with a small stitch over the end of the loop.
These can be made in a row or in a circle or half circle. They can be "strewn about" to look like little flower or vegetable garden seeds on the ground.
Running Stitch
Easiest of stitches yet. Running stitch is often called a "stab stitch" because the needle is stabbed up, and stabbed down, stabbed up, and stabbed down again and again to make the separate stitches.
But it is called running stitch because you can run the needle in and out of the fabric and then pull the whole thing through for a line of several stitches at once.
Running stitch can be used as an outline or decorative stitch.
I used 3 strands for this stitch. Bring the needle up from the back at one end of the stitch. Insert the needle into the other end of the stitch and pull through to the other side. Done!
You can make these in a line or side by side or randomly placed as a fill or for texture.
Here's the "running" method.
Back of the work:
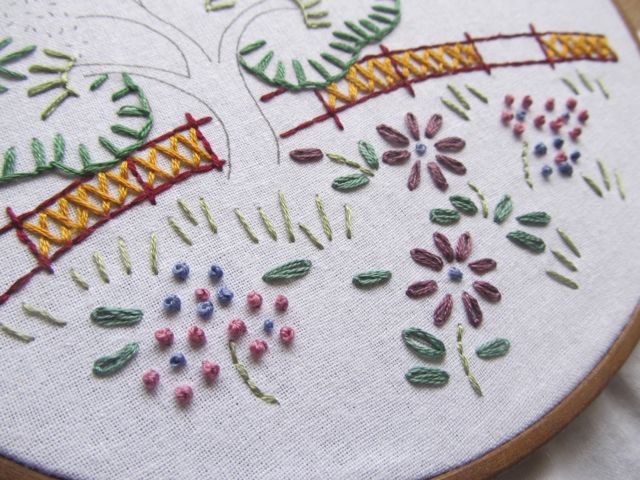
Here is sampler two:
French knot flowers - 3 strands. DMC 223 and 793
Lazy daisy flowers and leaves - 4 strands. DMC 3740, 223, and 502
Running stitch grass - 3 strands. DMC 3053
Back stitch - I decided on back stitch for the curved stems. 3 strands. DMC 3053
Tomorrow, we'll finish off our samplers. Can you believe it!
But that's not all to Embroidery School. Once we finish our samplers, we'll learn how to display the work and care for it.
Already an accomplished stitcher? Then download the samplers and teach a friend or child.


Thank you so much for your instructive and beautiful website. Your website is a 5-Star beauty. New adventure for me as i am learning this now at 76 years of age.
ReplyDeleteBest wishes,
Jane Palik
Thanks so much Jane, for your kind words. I am not very tech savvy, but I hoped I could to help people learn relatively painlessly. I'm so glad you're here and enjoying it!
Delete