Tuesday, August 26, 2014

Mending: Links How to Fix Crocheted Items

Crochet stitches are so varied and knotted, I'm often at a loss for fixing a torn thrifted blanket or handmade sweater.

But now I've found some tutorials for repairs. Should I say I'm hooked and I want my fix? Probably not.

Repair a crocheted blanket

Repair a granny square afghan

Another mend a granny square tutorial

Mending the center of a granny square

Mending crocheted lace

Mending a tarn rug


Not technically a repair for crocheted or knitted items, but this explanation for how to weave in yarn ends will make all those projects look better.

Wednesday, August 20, 2014

Mrs. Sew and Sew 1944

It's a movie break!

How to make popcorn:

Pour in just enough oil to cover the bottom of a heavy saucepan. Place three kernels of un-popped popcorn in the bottom of the pan. Cover the pan and heat the oil until you hear the three kernels pop.

Add as many kernels as will cover the bottom of the pan. Cover tightly.

Shake the pan over the fire or heating element so the kernels move. This prevents burning.

The kernels will start to pop at an amazing rate in a minute or so. When the popping sounds diminish to the point where you can only hear a couple of pops every 2-3 seconds, remove the pan from the heat.

Turn out your fresh popcorn into a bowl and salt lightly. 

Why popcorn? Because it's movie time!


If you enjoyed this movie, you might also like these books available here and there where vintage books are sold.

Wednesday, August 13, 2014

Pin Money - A Bit of Women's History

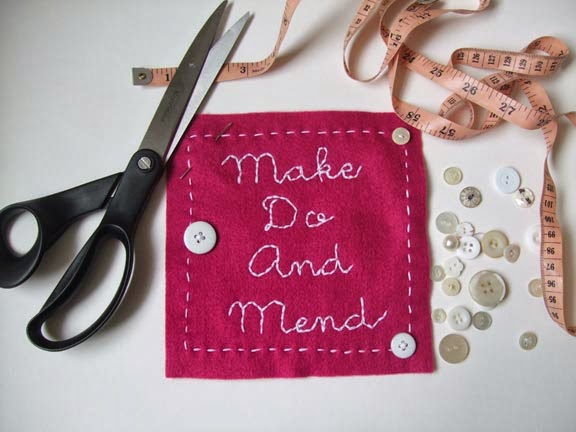
My grandmother used to tell me stories from her life and all of them seemed to relate to one of two things: the music of the good old days and housekeeping. I learned the Charleston from her and I learned that a woman always manages her grocery budget in such a way as to be able to skim a bit of money off to save for a rainy day. 

This money was called "egg money" because often there wasn't much that could be skimmed so women sold eggs from their backyard chickens to make a little extra. Egg money was saved for emergencies or that big household purchase before credit reared its ugly head in our modern world.

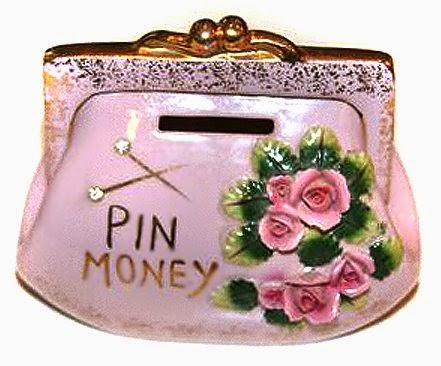
But before there was egg money, there was "pin money", a term coined in the fourteenth century. 

Pin money was an allowance a husband gave his wife for her personal expenditures such as clothing and personal care items. My favorite descriptions of how pin money was used, however, dates from the sixteenth century on when pins were used to create gorgeous gifts.

Pins used to be quite expensive and were sold only a few days a year. Girls and women saved money so they could buy pins for both household and gift-related use. An allowance or spare coins were saved to purchase these and their value was much greater than we can imagine today.

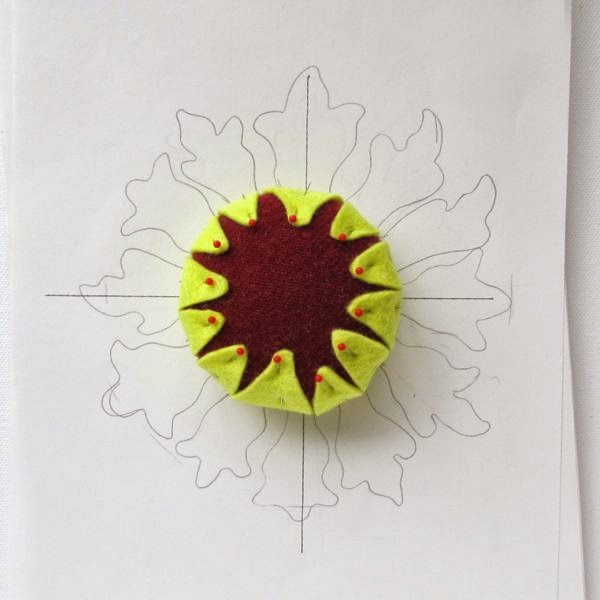
Pins were bought and treasured and then used to create messages and designs on velvet or satin pincushions, often heart-shaped. These gifts were exchanged between older girls and also given by suitors to young women they fancied enough to woo with marriage in mind. WWI soldiers made them and sent them home to loved ones while they convalesced in veteran hospitals.


I also found a fascinating article regarding a man who bequeathed a sum of money to the First Lady of the US, calling it the Henry J. Freeman Jr. Pin Money Fund. This money would be paid out to the First Lady after the last of his descendants had died. Why? He felt the leader of our nation was paid a pittance and the First lady of the nation should have a bit of spending money of her own. Here is the article.


The advertisement came from an archived Louisiana newspaper, but I couldn't get the link to work. It seems that you could sell Ladies' Home Journal magazines for extra money which the ad represents as pin money.

The photo of the two heart cushions came from here.

Do you save money from your household budget? What do you call it? How do you save it? In a jar? Stashed in your lingerie drawer? 

No, I'm being nosy. I just love to hear how household wisdom has survived into our modern times.

Mending: Armpit Rip

I've been finding a number of really nice tutorials on About.com under the DIY Fashion category. This one explains how to mend an underarm rip.

It has clear illustrations for repairing a rip in the armpit of a shirt including a section on how to make a gusset to fit (assuming this is not a simple seam repair).

This tutorial would also be useful for altering those too-tight underarms on blouses and workshirts.


Wednesday, August 6, 2014

Mending: Fix a Torn Seam

A split seam can be the easiest of repairs. Seam repairs are often needed in pockets or at shoulder joins. Here are some good visually based explanations for how to repair a couple of types of seams that have come apart.

How to fix a flat felled seam

Hand sew a ripped seam - gorgeous video

How to mend a seam


Tuesday, July 29, 2014

Mending: Repair Holes from Torn Out Buttons

Buttons either seem to disappear completely, become VERY loose with that wobbly "hope-it-stays-on-until-I-get-home" bit of thread, of it pulls off leaving a hole where the button used to be attached.

This super fantastic tutorial from Threads magazine explains how to solve that last problem with clear instructions and great photos.

If you need to repair a hole where a button has fallen off of your jacket, blouse, or skirt, just click, go, and sew. And another find for this fix.


Tuesday, July 15, 2014

Mending: How to Sew on a Button

There's a right way and a lazy-bum way to sew on a button.

This is a brilliant and easy Threadbanger video showing the right way to sew on a button.

And you get cool music in the background. Which makes it a kind of button-sewing-music-video.

And because this is so short and to the point, here's a little extra for you: How to organize those little zip lock bags with the extra button that comes with a new garment.

Thursday, July 10, 2014

Tutorial: Hot Water Bottle Cozy


It's back to bed with this hot water bottle cozy made from vintage sheets. I could even tolerate a cold if I could wrap up with this beauty and take a nap.

What you need:

paper for pattern

hot water bottle
cotton flannel (enough for 4 layers) or wool blanket or cotton or wool batting (enough for 2 layers)
old sheets or other quilting cotton
single fold bias tape

Fabric amounts depend on the size of your water bottle.

What to do:

1. Trace your hot water bottle onto paper adding 1" for seam allowance.


2. Use the three areas shown for your pattern pieces. One whole piece is the front; the top for the upper back; the bottom for the lower back. make sure you cut so the back pieces overlap.


3. Sew together strips of fabric of similar widths to create a patchwork fabric from which the front will be made.


4. Baste top to two layers flannel or one layer wool blanket or batting.


5. Baste fabric used for upper and lower back pieces to flannel or batting also.


6. Fold 1" wide single fold bias tape over one wider edge of upper back piece and one wider edge of lower back piece. Sew across to finish. These edges will over lap and provide the opening for inserting and removing the hot water bottle.


7. Place the front and back pieces right sides together, making sure the back pieces overlap at least 1/2". Trace the full pattern onto one side and sew on this line all the way around. 


 8. Cut out the cover leaving 1/4" seam selvedge. Clip inner top curves carefully.


9. Turn the cozy right sides out and insert your hot water bottle into the bottom of the cozy. Now fill it with hot water, seal, and slip it into the top of the cozy. 


Oh joy! Time to get warm!


Tuesday, July 8, 2014

Mending: Bed Sheets

Oh, that thinned out, worn bed sheet area. It's one area. Why does the rest of the sheet look fine?

Here are several tutorials on how to mend your sheets and make then last much longer. Why should you? if you're like me, you like all cotton sheets. Not the new ones that are scratchy and have a very low thread count. Or even the new Egyptian cotton ones that are made with so many chemicals, they don't have that fresh dried-in-the-sunshine smell. Oh, no siree! I mean those old Cannon, USA made sheets that can only be found in thrift stores.

So I do anything I can to extend the life of these thick and delicious babies once they start to thin out. Which by the way, takes me years to do. These old sheets last longer than any new ones I've bought in the last 20 years.

Mending a bed sheet

How to mend a bed sheet

Sheet mending day

Mending a bed sheet hole

My mother used to mend the small holes by simple darning the hole with the sewing machine. By this, I mean she sewed back and forth on the sewing machine in one direction completely covering the small hole, and then she sewed back and forth perpendicular to (across) the first stitching. This covered the hole completely and made a new fabric.

Wednesday, June 25, 2014

Mending: Darning Socks


I love darning socks. Mostly because I love my wool socks and refuse to give them up. Darning is like the duct tape of sewing fixes. It's inexpensive, durable, and stays put.


Darning wool is easy to find. JoAnn's carries it in the US and both Spotlight and Lincraft carry it in Australia. You'll need tapestry needles, darning needles, or those kid plastic needles, anything with a large eye. You can use a darning mushroom inside your sock, but an orange or lightbulb will do.


Darning doesn't just grab edges and pull them together. No matter how much you wish it did.

It's a lovely process of creating a fabric by weaving back and forth across the hole and into the fabric to recreate the missing area.


Here are some lovely sites to show you how to darn your socks. You can also use this technique with sheets and cottons by sewing back and forth on your sewing machine and then again up and down.

How to Darn Socks

Make Do and Darn

Wednesday, June 18, 2014

Legalities of Refashion


In 2009, the Arts Law Center of Australia published an article outlining the legal issues involved in upcycling fashion. Is it legal? Are we stepping on any toes if the original tag is part of the artful design? Is there intellectual property, trademark, or other legal interest invested in clothing and design?


For a fascinating and easy-to-read examination of the ramifications of upcycling in fashion and staying legal have a read.

Tuesday, June 3, 2014

Mending: Zippers


Oy vey! Zippers are difficult to mend and costly to replace. At least that's the scuttlebutt. Fortunately, there are a whole lot of zipper life hacks and ways to mend them.

Here are a few sites that explain several common zipper problems and what to do about them.

How to Fix a Busted Zipper

How to Fix Every Common Zipper Problem

The DIY Tailor on 3 Common Zipper Problems


Wednesday, April 30, 2014

Mending: Knits


 Mending knits is a bit of a mystery to me as I don't actually knit and I know that if you cut something crocheted, you are cutting right through a long line of knots. What to do if your jersey knit tshirt, wool sweater, or granny square blankets gets a hole?

First determine if it is on a seam or not. If it's a seam, easy peasy, just sew it back together again. If it's a moth eaten hole or a tear or a broken stitch, there are some methods for repairing it.

You can always patch a sweater, especially a wool sweater, and to be honest, you will probably be up-trending it if you do. Especially if you patch with with either rustic homespun or linen or a woven fabric of a tribal or global quality. For that "I could be a yarn-bomber" look, use a felted wool patch from another sweater.

If you want to properly mend your knits, take a look at these tutorials and follow-alongs:

Knitty.com - Repairing Knitwear
How to Fix a Small Hole in a Knit

Wednesday, April 9, 2014

Mending: How to Patch


Mending your clothing, towels, bedding, and other linens is a time honored and frugal tradition. When folks had to spin their own fibers and/or weave their own cloth and sew their own clothing, taking care of garments and linens was a time saving device.

Now we are inclined to throw away an otherwise perfectly good garment rather than mend it. Is the disposable garment saving you time?


How much did it cost you? How many hours did you (or your parent or partner) have to work to pay for it? How much will it cost to replace? How many hours will you (or your parent or partner) have to work to pay for it? Is it good fabric? Will you really be able to find a comparable well-made replacement in today's cheap import discount department store? Will the replacement item available be made from plastics (acrylic, polyester) rather than comfortable, breathable natural fibers (wool, cotton, hemp, rayon/viscose, ramie)?

If we take all those questions under consideration, we can see it takes less of your time, your money, and your raw materials to patch your clothing than it does to replace it.


Here's how to do it:

4 Secrets to Patching Clothes
Mend Your Jeans
How to Mend a Hole with a Cute Patch

Friday, April 4, 2014

Tutorial - William Morris Sunflower Pincushion


I recently designed this William Morris Sunflower Pincushion for the How.Do iPhone app. It was based on an Arts and Crafts movement William Morris sunflower wallpaper design.


 The tutorial allows you to draw your own petals or download this PDF for instructions and pattern templates for the pincushion.
You can use new or repurposed materials for this project. I have used upcycled wool sweater and blankets for the pincushion shown in this tutorial.

Wool fleece is the preferred stuffing for pincushions because it has a bit of weight and the lanolin keeps pins and needles from rusting.

Materials needed: 

6 1/2” (15cm) diameter repurposed sweater or other stretch knit fabric circle
3 colors of wool felt or felted wool blanket:
1 – 7” (18cm) square for inner petals;
1 – 7” (18cm) square for outer petals;
1 – 10 1/2” x 1 1/2” (27cm x 4cm) strip for base
2 1/2” (6.5cm) diameter cardboard circle
Wool stuffing


Using 2 strands of embroidery thread, sew a wide running stitch around the perimeter of the circle and pull slightly to gather.

Stuff with a ball of wool fleece and top with a cardboard circle.


Pull your thread tight and sew your gather shut. Tie off securely. The cardboard now makes the base of the ball a bit flatter.


Center the ball on a 90 degree cross and draw 12 inner petals around your central ball (or download the pattern here). Cut this out and use as a pattern for your petals.


Trace this inner petal layer onto the back of a square of wool felt or thin felted blanket. Cut this out carefully along tracing lines.


Wrap the inner petals around the ball with the gathered side inside the petals. Pin petals in place for now.


Use the same method to draw outer petals (or download the pattern). Make these more ornate and as similar to William Morris' style as you can.

Don't worry about being perfect. Nature's petals are varied and unique. Yours can be also.

Trace this pattern onto the back of your second square of felted wool. Cut carefully along tracing lines.


If you center your ball on the outer petals you can see how the sunflower is starting to emerge.


Using 3 strands of embroidery thread, attach the inner petals to the central ball with two or three long stitches up and down each petal. Pull tightly enough that it holds the petals close to the ball but not too tightly that the petals pucker.


Using 3 strands of embroidery thread, embellish the outer petals similarly but this time use a stem stitch to embroider your accents. Vary the number of accent lines per petal to create a more natural look. Keep the thread knots trimmed short and at the back of the petals.


Turn the ball over and center the petals over it, back side of the petals facing up. Use 2 strands of matching embroidery thread to sew the outer petals to the ball with a simple running stitch. I've placed a black thread around the ball to show where to sew.

When you turn the flower right side up, the outer petals will fall gracefully outwards and downwards, but the ball may yet be a bit wobbly. To provide stability, roll up your strip of felt and sew it closed with a whipstitch.

Turn the flower upside down again. Whipstitch the roll onto the flower just above the running stitch holding the outer petals in place. If the roll is too long, just snip a bit off so the ends meet. Join the ends together with a few stitches. Turn your pincushion right side up.


Congratulations! You have made a William Morris Sunflower Pincushion in the Arts & Crafts style.
   

Sunday, February 23, 2014

My Most Popular Sewing Patterns


Sometimes I'm asked which of my sewing patterns are the most popular.

Hands down, the Folksy Lady Rag Doll, Rag Dolly Tag Blanket, and Baby Teether Barnyard Babies are the best selling sewing patterns in my shop.


The Rag Dolly Tag Blanket is an easy grab toy for baby. It's made from a front and back and a few tabs that are knotted. These knots are easy for baby to hold or use for teething.

I have several pattern suitable for babies and a number of cloth dolls, including a smaller fashion doll-sized cloth alternative.


For home sewing, the Travel Pincushion has been been a rising star. For those who travel, keeping pins and needles tucked away when not in use is of utmost importance. But because the pincushion stands well, it can be set on an airplane tray or side table for safe use.

And I've been getting lots of wonderful feedback from makers of the Teddy Bear and Dinosaur patterns. 

The Teddy Bear pattern will make you look like a genius. It's so easily made from three pieces for front and back, but still has a pleasing plump shape and a super friendly, growl-free little face.

The Dinosaur plush toys are made for little hands. They are sized just right for toddler and young children's hands. They stand well so they store as well as they display on toy shelves. But they are also soft and lightweight for travel and trips to Grandma's house.


Visit the shop to see all the sewing patterns, hand crafted wooden tools, and embroidery patterns and kits.