Tuesday, December 31, 2013

Get STUFFED!

Guess who made the cover of STUFFED magazine?

That's right, Sally and Stripes the Monster sweaterdolls.

The magazine contacted me to see if I could send along these little cuties and then they decided to use them on the cover. I couldn't be more proud of my little sweaterbabies.


Thursday, December 5, 2013

Upcycling Tutorial: T-shirt Yarn Frisbee


Remember the “glad game” from Pollyanna by Eleanor H. Porter? The purpose of this game was to look for the bright side of a situation that seemed to have no silver lining. I used to think about that game as I lamented my children growing up, becoming more independent, and coming closer and closer to my own height. What could I be glad about? 

Well, I was glad for the pile of outgrown clothing looking remarkably like future stitching and crafting projects to me. Call me an optimistic opportunist! 

And so I'm glad that someone came up with the brilliant idea of making t-shirt yarn, or tarn. Tarn is remarkably fun to crochet into floor mats as it works up quickly and is soft and spongy underfoot.

It's a bit heavier than most yarns, which also makes it perfect for a homemade frisbee that's heavy enough to fly and soft enough not to hurt your child when it beans him in the forehead or knocks her on the shin.

To make a crocheted t-shirt yarn frisbee, you only need to know some basic stitches and a willingness to cut up some old clothes. 


Materials needed:
t-shirt yarn, approximately 13 metres total (one larger adult t-shirt or two-three children's t-shirts) 12mm crochet hook
scissors
smaller crochet hook or tapestry needle (optional) 


Instructions: CENTER RING: Make a slip knot on your crochet hook. Chain 6. Slip stitch into the first chain to create a closed circle.


RND 1: Crochet 2 double crochet (dc) into each chain for a total of 12 stitches around. Slip stitch (sl st) into the next stitch to soften the circle.


RND 2: Crochet *2 dc in the next stitch, then 1 dc in each of the next two stitches*. Repeat from * 4 times for a total of 16 stitches. Sl st into the next stitch.


RND 3: Crochet *2 dc in the next stitch, then 1 dc in the following stitch*. Repeat from * 7 times for a total of 24 stitches. Sl st in the next stitch. 


RNDS 4-7: Work rounds 4-7 using the directions for RND 3. (Omit round 7 for a smaller frisbee for younger children.)


Up to now, you have been increasing stitches (adding more stitches per round) to create the round frisbee disk. Now you will decrease (make fewer stitches in the round) in the next round to create the rim that folds to the back of the frisbee. 

RND 8 (Or RND 7 if you are making a smaller frisbee): Make *3 treble crochet (tr) in each of the next 3 stitches, skip one stitch*. Repeat from * all the way around the circle. Sl st in the next stitch. Cut the t-shirt yarn and pull it through the slip stitch to tie it off.


Use a smaller crochet hook or tapestry needle to weave the tail ends of the tarn into the back side stitching loops. 

Your Friendly Troubleshooting Guide
Crochet in the round can be a bit tricky if you've never down it before. The main problem that occurs is that the disk won't lay flat. It does this for one of two reasons.

  • *It's a bowl. Too few increases. 
  •  
    *The edges are wavy. Too many increases. 

    While these guidelines are consistent in theory, in practice they are not the only source of the problem when you use t-shirt yarn.

    T-shirt yarn is much more stretchy than a normal skein of wool. As you stitch, you may find yourself actually stretching the yarn to maintain the tension you want, only to produce stitches that pull on each other and create waves and bowls that would not otherwise have formed.

    Another spanner thrown in the works is that not all t-shirts are the same weight or fabric. If you have followed the same directions for making t-shirt yarn from shirts of differing weights and fibres, the actual yarn width and stretch can vary greatly. 
  •  
    Don't let this deter you from making a frisbee. Although aerodynamic in nature, it is not rocket science. These are some strategies I've used when the t-shirt yarn was not being compliant. (Yes, blame the materials. You are perfect.) 
  •  
    Wavy edges: If you find at round 5 or so that your frisbee is becoming wavy, instead of pulling out your stitching and starting over, try crocheting the next row entirely of one dc stitch per stitch. That will stop the increasing and flatten out your work. Continue the next row as before including the increases, but your total number of stitches will have changed. Congratulations! You are learning to improvise. 
  •  
    Bowl: I have never made a frisbee that didn't try to become a bowl because it was hard to maintain the perfect tension in the first two rows without stretching the yarn somewhat as I worked. By round 4 or 5 if your work is becoming a bowl, you may need to pull out a row or two and make sure you are not pulling too tightly on the yarn as you work.


Crochet terms:
chain – ch
double crochet – dc treble crochet – tr slip stitch – sl st increase – increasing decrease – dec 


Tips:
*** One adult t-shirt will yield about 13 metres of tarn while a child's t-shirt may yield only 8.

*** Don't use a ribbed t-shirt. Use a nice uniform cotton jersey that is not too thick to produce a workable yarn.
*** To change colours, simply tie the new colour tarn as close as possible to the tarn on your hook. This will let you continue stitching while the colour changes with the very next stitch. Weave the knot tails into the stitching at the back.
*** If you don't have fancy stitch markers that tell you when you have come to the end of your round, you can use a paper clip or, better yet, tie a bit of contrasting tarn into the last loop of the each round as you go. 


The best shirts for tarn have no side seams.


Sunday, December 1, 2013

Tutorial: Let It Snow! Paper Snowflakes


Okay! Okay! So it's coming on to summer in Australia. I don't care. I have the wintertime spirit as Christmas approaches. If it's not going to snow outside, it will just have to snow inside.

You can make snowflakes out of any kind of paper.

To make it easy, I put together a PDF that provides:
  • Instructions for making rectangular paper square
  • Instructions for making the snowflake base ready for cutting
  • Twenty (20) snowflake patterns to cut


Make them from book pages, color Christmas catalogs, newspaper, origami paper. You can even make them from ironed linen or cotton quilting fabrics!

I made the colorful ones above from a Kmart ad that was left in my mailbox.


Let It Snow!!!!!


Sunday, November 3, 2013

Eco-Friendly Fiberfill: Fact or Fiction?

 A lot of people are stating they use eco-friendly fiberfill in their toys and household products. But as yet, there is no measurable standard for the term eco-friendly. There is no carbon footprint marker. There are no maximum levels of waste produced in air, water, and landfills. And there is no requirement for biodegradability. Eco-friendly is a colloquial term only. There is no "there" there.

But there are products that are not harmful to the environment. So how should we choose? Here are some natural fibers and products.
  • wool
  • cotton
  • down and feathers
  • buckwheat
  • kapok
  • fabric, thread, and yarn scraps
  • recycled denim insulation
  • silk
  • corn-based
  • thistle down

Just because a product is natural does not always make it an eco-friendly choice. Case in point: NatureWorks corn-based fiberfill, while biodegradable and basically natural, is openly made from GMO corn products. For those for whom the GMO industry in general and Monsanto in particular is a red flag, corn-based eco-friendly fiberfill is simply not eco-friendly.

Bamboo has found a lovely following but now it has come to light that some bamboo harvesting is done unethically although there is a great deal of ethically managed bamboo as well. Additional concerns include claims of having naturally antibacterial properties, which bamboo has until it is highly processed and then it loses most of its antibacterial properties. This has led to companies adding synthetic antibacterial agents without reporting this to users of the product. Your bamboo stuffing may be clean and ethically made or it may be harvested improperly affecting local fauna adversely and coated with chemicals you didn't know were there.

Of course, plain old cotton isn't going to get away scot-free. Cotton is usually bleached which leaves a huge level of dioxin polluted waters in its wake. The cotton itself may have been grown saturated with pesticides. Natural cotton is not white. It may be yellow, brown, or green. Manufacturers heed your call for a clean-looking product and process and bleach and treat with toxic chemicals. But if you live near a cotton producer, chances are good you can purchase raw organic cotton for your crafts.

Mexico is a large producer of shredded denim insulation. This stuff is brilliant if not a complete mess to cut and use. But if you can get ahold of a bat or two of it, you could try it out.

PLA (polylactic acid) is the new watchword on eco-friendly fiberfill. read this Made from E. coli - I kid you not - PLA seems to use a much less polluting polymerization process than using oil waste. Still, it is new on the market and fermentation of E. coli as a renewable resource makes me wonder how much bacteria is entering the water table, but I'm hoping to see good results with this as long-term studies come in. CORRECTION: PLA is the same thing as the corn-fiber mentioned above. PLA is made from corn sugars. However, there is a new PLA material being made from E.coli.


Here's the ONE eco-friendly claiming fiberfill that will never be eco-friendly. Polyester fiberfill and/or recycled polyester fiberfill. Some people love the fact that poly fiberfill can be made from single use plastic water bottles. Some people think it is eco-friendly to manufacture plastic water bottles and then use and pollute the same amount of water to recycle those bottles into something else. Either way the carbon footprint is ridiculous and completely unnecessary.

Isn't it good to recycle? The question is faulty. It was a bad idea to use so much energy and throw so much pollution into air, water, and landfills to even make single serve plastic water bottles in the first place. We're not doing the world a favor by increasing the market for a polluter only to create nearly the same pollution a second time by reprocessing that synthetic and toxic substance. Eco-friendly would be to never have damaged the ecosystem in the first place. The only eco-friendly poly fiberfill is poly fiberfill that was never manufactured.


This brings me to my personal toy filling of choice: wool. Wool ignites at higher temperatures than cotton and synthetic fibers and has a lower rate of flame spread. It does not melt or drip causing burns or release highly toxic gasses into the air when burning as synthetic fibers do. 

Wool is considered to be naturally hypoallergenic because it is naturally mold resistant and is not as friendly an environment for dust mites which are the actual cause of many allergic reactions in people. Synthetic materials retain your sweat and encourage mold and dust mites and their droppings. 

Wool is an insulator and warms up next to the body making dolls comforting to hold and snuggle yet it moves moisture away naturally, without holding it to become a bacterial or fungal breeding ground. Wool is completely renewable. Sheep need shearing.

Wool alcohols in lanolin can be irritating to some people, that's a fact, but poly fiberfill can also cause skin irritation. Nothing is right for everyone. But sheep and organic cotton fields don't pollute our planet the way plastics manufacturing does.


Conclusion?  Plastics are the alternative. They were introduced less than 100 years ago. You don't have to look for "natural alternatives". Nature is the norm, not the alternative.
Cotton and wool have long been fibers of choice. Easily renewable. Can be organically produced. Bleaching not necessary. Warming in the hands and next to the skin. There are many natural, truly eco-friendly, and available sources for toy and pillow stuffing. We can be selective in our choices and not believe the lies of the oil and plastics industries.

We've always had the means to fill toys and dolls safely. There are existing cloth dolls from the 1st century. (Roman doll above.) This proves it isn't necessary to use something that will NEVER degrade to create a lasting product.

This online shop http://www.ecofilling.com has eucalyptus stuffing, hemp stuffing, kapok, wool, cotton, and GMO-free corn stuffing. It is based in Australia. It's a woman-owned and run home business.

Itching to stitch?   

Sign up now for a free embroidery pattern.

Poly Fiberfill: Real-life Monster in Your Child's Toys

Follow my blog with Bloglovin

I've been having this problem lately. It's a mental problem, a frustration, a sadness. It comes up when I look at friends' beautiful toys and dolls and patterns. It happens when I gawk in awe at art dolls made of wool and linen, with carefully hand stitched elements and embroidery. It forces an Armageddon-powered "why gods why" cry of despair to come flying out of my mouth like demons from craft-hell.

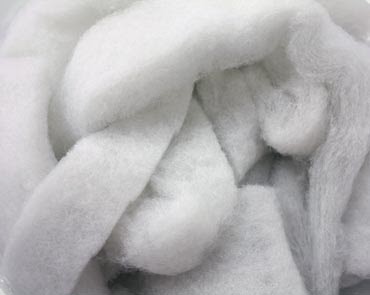
My problem is this: WHY IS ANYONE WHO LOVES CHILDREN AND ART STILL USING CHEAP POLY FIBERFILL IN THEIR PRODUCTS AND DESIGNS?

Poly Fiberfill is my main nemesis. My skin crawls when I see art plush dolls made from wool and linen with carefully handmade accessories and then stuffed with polyfill. ESPECIALLY when those dolls sell for $250. Polyfill feels cheap. It has no heft. It feels weightless. It feels dead. It has no physical warmth.


And while the abstracts on the finished products state it is inert in its finished form, they also state that protective measures must be taken when using such fibers. Contradiction? You bet! There are other abstracts that clearly state the consequences of ingesting or inhaling these fibers (more below).

Yet our infants suck on these fibers daily, breathing and ingesting fake fur and leaking fiberfill which are coated with silver colloid and Triclosan antibacterial agents and other plastics meant to keep the plastic toxins from leaching out of the fiber.

Plastic fibers are just that: plastic. Taiwanese manufacturing calls these chemical fibers. In truth they are petrochemical fibers. They are made from oil waste. They are the poop of oil production. And we are covering our nakedness with them and hand sewing cuddly toys from them. They pollute on a grand scale and we take no responsibility for that as the end-user of these fabrics and fibers made in other countries. If they were produced in our own backyard, we might have a different opinion about their safety.

REASONS FOR NEVER AGAIN USING POLYESTER FIBERFILL AND FABRICS:
  • It is made from polyethylene terepthalate. Poly fiberfill is registered in the US Toxic Substances Control Act. This would not be necessary if the product were considered completely non-toxic. 
  • Fibers are coated with additional chemicals, pesticides, and bactericides to seal in toxins and kill natural elements.
  • EPA studies show chemical fiber manufacture creates "significant emissions" while "particulate emissions from fiber plants are relatively low, at least an order of magnitude lower than solvent VOC emissions". read here
  • Engineers such as Anguil have been contracted to create better toxic by-product recapture machinery because "the oxidation and carbonization furnaces and ovens emit hydrogen cyanide, ammonia, and volatile organic compounds (VOCs)...some of which are extremely dangerous to human health, even in very small quantities. Other pollutants of concern for carbon fiber producers include harmful gasses such as carbon monoxide and nitrogen oxide." 
  • Studies in countries engaged in "chemical fiber manufacturing" show extremely high levels of carbon pollution and carcinogenic particles in local water and air. read here
  • In manufacturing poly fiberfill, three known carcinogens are produced in excess of occupational safety limits. (Health and Safety - UK)
  • Polyfill is deemed to cause no respiratory distress, yet according to many sources, manufacture AND USE of these fibers require proper ventilation and respiratory protection. read this
  • Polyfill decomposes with heat and emits hazardous gasses (vinyl acetate and acetic acid). read here
  • Hazardous gasses are produced when burned: carbon monoxide, organic gasses, aldehydes, alcohols, and calcium salts. read here
  • While ingestion and inhalation of poly fiberfill is considered "unlikely", safety warnings are: "Prolonged exposure may cause skin irritation." AND "If ingested may cause abdominal pain, vomiting, or diarrhea." AND when inhaled can "cause irritation to upper respiratory tract, nose, and throat and can result in coughing, chest discomfort, and headache." read here
So there's my rant and there's the evidence. Polyester fiberfill is not the faultless angel of toymaking and neither are plastic fiber fabrics. They have consequences in our world. They are not clean and harmless. 

And here are some of the many other original choices for toy and doll stuffing. 
  • Wool
  • Cotton
  • Kapok
  • Buckwheat
  • Syriaca (milkweed)
  • Corn (not generally GMO free according to the manufacturers) read here
  • Down and feathers
  • Your fabric, thread, and yarn scraps
  • Denim insulation
This is where I get my wool fleece stuffing. If you are in Australia, I highly recommend this woman-owned home business: http://www.morningstarcrafts.com.au


CHALLENGE: Polyfill is the alternative so the challenge is to go back to a natural toy and doll stuffing option. For toy pattern makers, make your next sample doll out of cotton fleece or flannel or linen and stuff with any of the above non-plastic stuffing materials. Note what materials you used to make your doll and give materials options that enable the maker to choose for themselves but also educates them to the possibility of using a natural, less-harming product. If you make and sell toys, consider a natural fibers product to expand your customer base.


Thursday, October 24, 2013

Bats go BOO!


Finding the right materials for what I want to do is sometimes a great challenge. It makes every doll a one-of-a-kind experience for me, the maker, and you, the recipient. This bat is a custom order.


This bat is made from repurposed wool sweater, wool suiting, velvet, and the fringed end of a velvet cut out scarf. The little toes let it hang upside down as any respectable bat should.

This weekend I'll be buying Halloween candy for the trick or treaters. May not get many kids at the door, but that last one before we turn the light off? Oh, yeah, baby, are they going to get a LOT of candy!

Don't you love being the last one to the door. "Oh just take the rest of the candy. I'm going to bed." Good times.


I have 2 favorite Halloween memories: the year my older brother and I trick or treated so much we had 4 bags (old fashioned grocery paper bags) of candy & the year I haunted a rich neighborhood and someone had a bowl of nickels. Doesn't sound like much, but a handful of nickels might have been $2 and back in the day when a good sized Hershey's bars only cost 10 cents and the large Tootsie Roll was 5 cents!
Do you have a favorite Halloween tale? Are you batty about candy?


Monday, October 21, 2013

Upcycling Tutorial: Bunting Bunny for Baby


This is one of my favorite quick but unique gifts to make. It's simple to make, takes very little time, and uses very little in resources.


What you need:Sleeve from a sweater (medium weight or lighter weight) or long sleeve jersey knit pullover
Handful of stuffing
Matching embroidery floss or thread
Bit of coordinating fabric or sweater material (for inside of ears)


What to do:
Basic form:
Lay the sleeve on your work table flattened so the sleeve seam is facing you. Draw a curved line from back to front to become the top of the head. Add a seam allowance of about 1/2" and trim away excess sleeve. The back is where the sleeve seam is.

Sew between the arrows and tie off leaving an opening for turning.


Now flatten the sleeve with the sleeve seam centered and facing up. Draw a couple of curves from side to center. These will become the little legs.

Sew completely across along this line. Add a bit of selvedge and trim away excess fabric.

Turn right side out through the opening at the top of the head.


Head:
Cut a small length of sweater or use some ribbon. You'll need around 6" or more.

Stuff the head with a handful of stuffing. Using one hand grasp around the neck (yes, it looks like you are strangling the poor dear) and position the stuffing so that you feel you have a good sized head and good sized body below.
Wrap the ribbon or sweater piece around this neck you have created and sew or tie securely closed.


Ears:
Cut 2 ear shapes out of your sweater and two more out of a coordinating color, such as pink.

Sew together. Turn right side out. Crimp at each base and position inside the head opening making sure the front of the ears faces the front of the doll head.


Using a whipstitch or more invisible ladder stitch, sew the opening closed. Take a few stitches back and forth through the base of the ears to secure in place.


Infant safety:
Remember if the bunny is going to be given to an infant, do not attach buttons or loose ribbons or elements that could present a choking hazard.


Itching to stitch?

I have a free embroidery pattern and ebook for you. Just sign up and you'll get a free pattern with stitch and color guide, photo guide to printing patterns on fabric at home and more.


Sunday, October 13, 2013

Tutorial: Plucky Penguin Softie Pattern Download


Plucky Penguin is making his way from the South Pole to your home but he won't mind if you don't have air conditioning.

This pattern is super easy to make even if you're just beginning to sew. You can hand or machine sew new or repurposed materials to make this 9 inch tall softie doll.

Make the pattern bigger and you have a penguin pillow. Make it smaller and you can create your own march of the penguins or a whole flock of Christmas tree ornaments.


Plucky Penguin pattern is now available for free. Download the pattern.


Wrong way, little Plucky Penguin! Santa lives at the North Pole!


Saturday, October 5, 2013

Tutorial: Amish Puzzle Ball


There are some tutorials on the web for a puzzle ball or clutch ball but very few explain the 'puzzle' part of the ball and many actually sew all the pieces together discarding the puzzle component altogether.

This is how I learned to make an Amish puzzle ball from the women in the Mennonite community near my hometown in Missouri.


The puzzle ball is intended as an educational toy. It can be grasped by babies and taken apart and reassembled by older children. It fosters small motor skills which stimulate brain development and abstract thinking abilities.

A puzzle ball can be made with fabric scraps of all types, preferably woven materials. You can use satins, velvets, calicos, denim, wool suiting, corduroy, whatever you have on hand. You can use felted wool, old blankets, sweaters. Stuff with wool, cotton, or other natural stuffing if you can. Not only do I detest the idea of a baby chewing on plastic fibers such as fiberfill, that stuffing tends to be too insubstantial for a puzzle ball. A good puzzle ball is solidly made. 


Find a circular bowl or plate that is the desired size of your finished ball. Trace 6 of these circles on the wrong side of the fabric. Cut out the circles. Cut the circles in half and then in half again to make 4 wedges from each circle. You have 24 wedges. I'm using a 5" embroidery hoop here.

Now you need a pattern for the tops of the ball wedges. Trace the rounded edge of one of the quarters onto a scrap of reusable paper. Match the rounded edge in mirror image and trace the other edge of the ellipse.

Cut 12 of these ellipses.


With right sides together, match the round edge of the ellipse with one round edge of a wedge. Sew together using a 3/8 inch seam allowance. If you are making a smaller ball or not very good at sewing curves on a sewing machine, hand sewing is your best bet. A larger ball can be machine sewn easily.

Repeat on the other side of the ellipse, sewing the other rounded edge to a second wedge. Sew one side of the wedge together and halfway down the other side. Turn this piece right side out.


Now you can see the wedge shapes you'll be sewing, sew 11 more. Turn all right side out. Stuff solidly and whipstitch or ladder stitch your wedges closed.

Use button thread, quilting thread, or embroidery floss to join the top corners of your wedges together. You want to sew three circles together made of 4 wedges. Sew tightly enough to keep pieces touching but loosely enough that the wedges are not smashed together.
Now here's what makes the puzzle a puzzle! Leave one of the wedge circles as is with only the outer tops joined. Take the second circle and imagining the inner points numbered 1 through 4, sew points 1 and 2 together and sew points 3 and 4 together. That circle now looks like a mouth opening. Take the third circle and sew all the inner points together closing the circle.


To put the puzzle ball together, work the 'mouth' circle over the fully closed circle, like a rubber band. Point all the inner points to the inside center of the ball. Next work the open circle of wedges over the combined circles. Point all the inner points to the inside center of the ball.

When the ball is put together is doesn't look or feel like it can be taken apart. And when it is in pieces it doesn't look like a ball at all! That's the puzzle of the puzzle ball.

Want to skip making your own pattern pieces as described above? You can buy the pattern in my Etsy shop. Link below.


HAPPY STITCHING!